GUI quickstart#
This walkthrough takes the bundled CT phantom from preprocessing to a
radiomics CSV file.
Install Z-Rad using Installation, then open the packaged application or
run python main.py from the repository root in your Python environment.
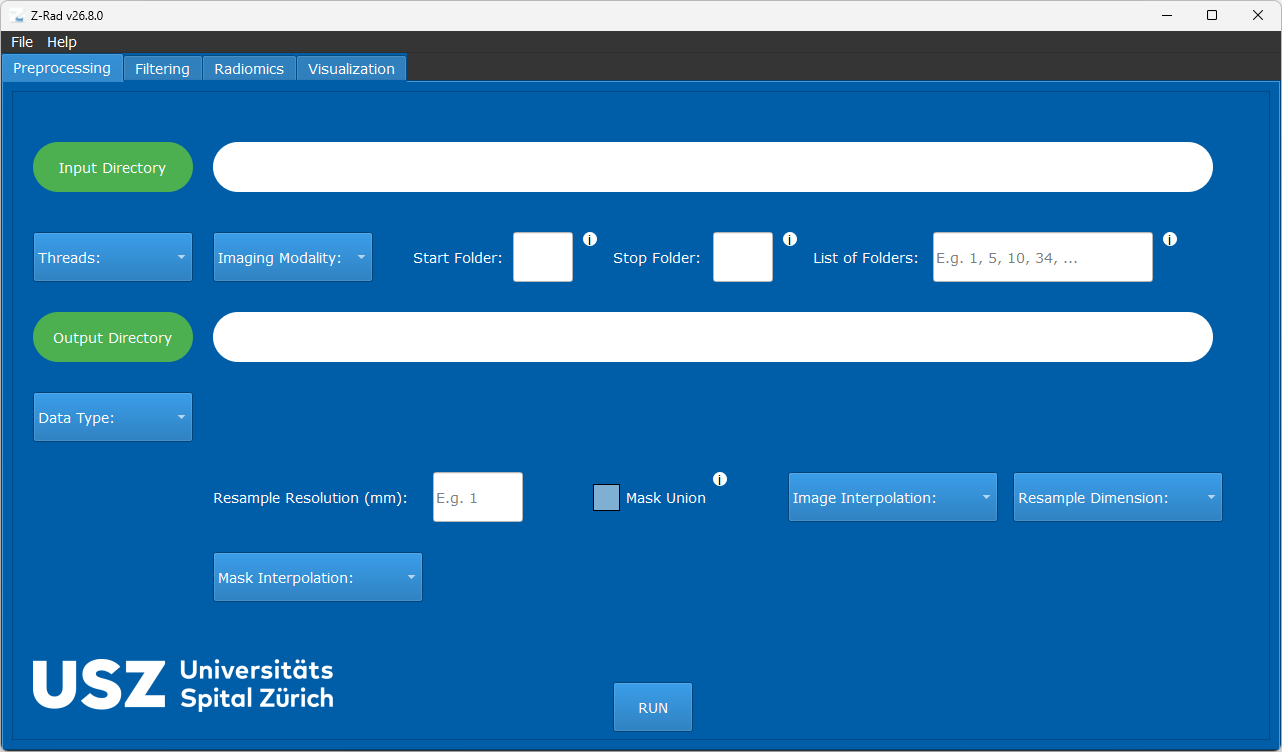
Z-Rad main window.#
The application has four tabs: Preprocessing, Filtering, Radiomics,
and Visualization. Each tab reads files from its selected input directory.
After a processing step, select its output directory as the input for the next
step.
Prepare the dataset#
Use the bundled CT phantom for a first run. The steps below use one case and fixed demonstration settings; choose settings for your own study separately. No Python installation is needed if you use the packaged application.
Download
ibsi_ct_radiomics_phantom.zipfrom the repository’s phantom archive page using the download button. If you already have a source checkout, use the same archive intests/data/.Extract the ZIP and open
ibsi_ct_radiomics_phantom/nifti.Create a working folder named
studywith aninput/case_01subfolder. Copyimage/phantom.nii.gzinto that case folder. Copymask/mask.nii.gzthere too and rename it toGTV-1.nii.gz. Keep the.nii.gzfiles compressed.
The resulting layout is:
study/
└── input/
    └── case_01/
        ├── phantom.nii.gz
        └── GTV-1.nii.gz
See the dataset attribution and license terms
before reusing or redistributing the phantom. Enter NIfTI names in the GUI
without .nii or .nii.gz. For DICOM input and datasets with multiple
cases, see Expected data structure.
Preprocess the images and masks#
Open
Preprocessingand selectstudy/inputasInput Directory.Set
Output Directorytostudy/preprocessed. Leave the folder-range and folder-list fields empty to process every case.Select CT and NIfTI, enter
phantomasNIfTI ImageandGTV-1asNIfTI Masks.Set
Threadsto1,Resample Resolutionto2mm, andResample Dimensionto3D. SelectLinearfor both image and mask interpolation and set the mask interpolation threshold to0.5. LeaveMask Unionunchecked.Save these preprocessing settings with
File -> Save InputorCtrl+Sto a file namedpreprocessing.jsoninstudy. ClickRUNand wait for the completion message. Check the run log for one processed case, zero skipped cases, and zero failed cases. See Troubleshooting for log locations.
For each processed case, the output contains image.nii.gz and
GTV-1.nii.gz. Open study/preprocessed in GUI visualization and inspect
the image and mask alignment before extraction.
Extract features#
Open
Radiomics. Selectstudy/preprocessedasInput Directoryandstudy/resultsasOutput Directory.Select CT and NIfTI. Enter
imageasNIfTI ImageandGTV-1asNIfTI Masks. LeaveNIfTI Filtered Imageempty for this workflow.Set
Threadsto1and leave the folder-range and folder-list fields empty. Select3D, averagedandNumber of Bins, then enter32. LeaveIntensity RangeandOutlier Removalunchecked.Save the radiomics settings to a separate
radiomics.jsonfile instudywithFile -> Save InputorCtrl+S, then clickRUN.Open
study/results/radiomics.csv. It should contain one data row withpat_idequal tocase_01,mask_idequal toGTV-1, andstat_meanapproximately-48.93HU. Theno_binsvalue is31: it counts occupied grey levels, which can be fewer than the requested 32. See Understanding results for column definitions and Troubleshooting if the row is missing.
Keep both saved configurations and the logs with the results. This mean differs from the Python API quickstart because this workflow resamples the image and mask first. For your own studies, use Feature extraction concepts to choose aggregation and Discretization guidelines to choose bin settings.
Add filtering when needed#
To extract features from a filtered image, run GUI filtering after
preprocessing. Select study/preprocessed as input, enter image as the
NIfTI image name, and save the filtered output to study/filtered.
Filtering writes a filtered image into each case folder; it does not copy the
original image or masks. Copy each filtered image into the matching case folder
under study/preprocessed so extraction can read all three files together:
study/preprocessed/case_01/
├── image.nii.gz
├── GTV-1.nii.gz
└── <filter-output-name>.nii.gz
In Radiomics, keep NIfTI Image set to image and enter the actual
filtered filename, without the extension, in NIfTI Filtered Image. Use a
separate results directory to keep this extraction distinct from the
unfiltered run.